Quality Control

Home / Quality Control

Quality Control

  • 1

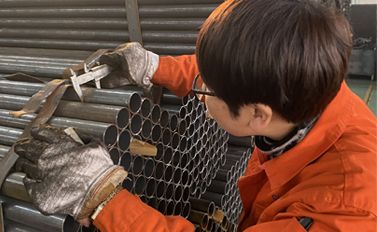
    After the raw materials enter the factory, the wall thickness and diameter of the pipe are measured

    After the raw materials enter the factory, the wall thickness and diameter of the pipe are measured
  • 2

    Re-inspect the hole position after laser cutting to ensure that there is no abnormality in the hole diameter and hole position to ensure smooth assembly

    Re-inspect the hole position after laser cutting to ensure that there is no abnormality in the hole diameter and hole position to ensure smooth assembly
  • 3

    On the inspection platform, random inspections are performed on the cut pipes to ensure mass production quality

    On the inspection platform, random inspections are performed on the cut pipes to ensure mass production quality
  • 4

    Recheck the welding length after welding to ensure that it is within the scope of the drawing

    Recheck the welding length after welding to ensure that it is within the scope of the drawing
  • 5

    Test the endurance of the lead screw
    Equipment Name: Horizontal Tensile Compression Testing Machine

    Test the endurance of the lead screw <br>Equipment Name: Horizontal Tensile Compression Testing Machine
  • 6

    Equipment name: Large-scale pressure bench test machine
    General test gantry load capacity

    Equipment name: Large-scale pressure bench test machine <br>General test gantry load capacity
  • 7

    Equipment name: Test tension and pressure test machine Test pole mechanical performance and data trend
    Equipment name: Test tension and pressure test machine Test pole mechanical performance and data trend